Last updated: 11 years ago
Alright, we will now explain what those custom meta fields are all about on the menu items settings tab.
Go to your foodPress settings page and click on the ‘Menu Items’ tab.
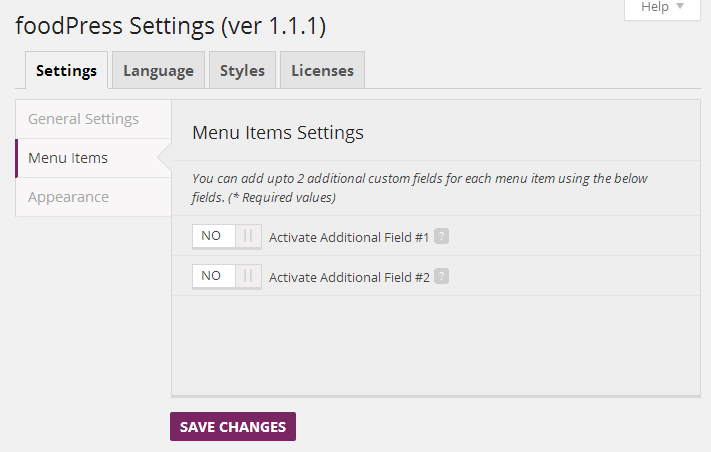
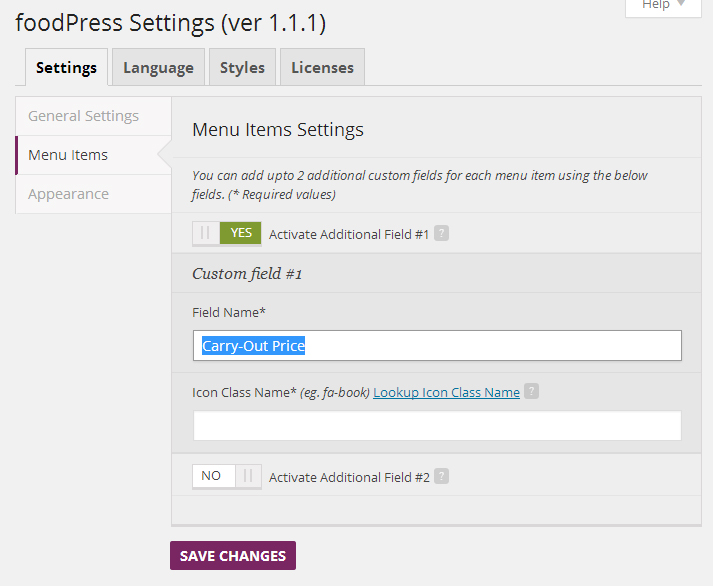
You will see the additional fields that allow you to place additional custom meta fields on the front end of the website. Let’s activate field #1 and see what options we have.
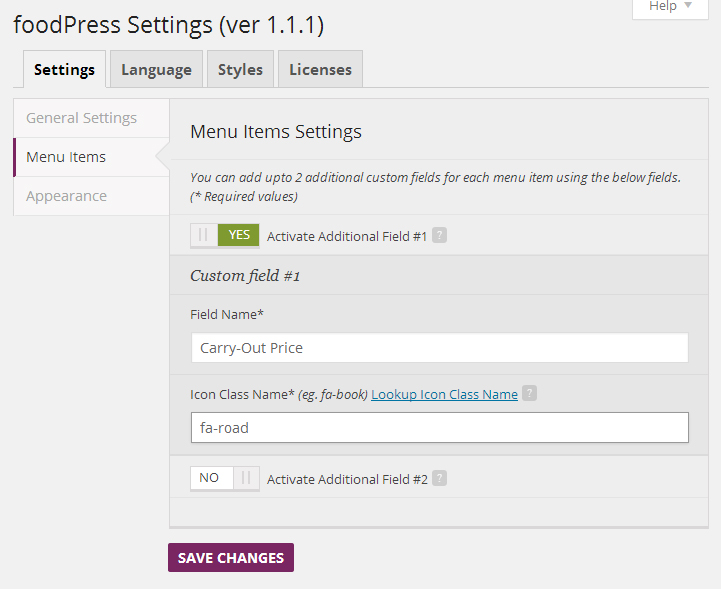
If you notice, you will have ‘Field Name’ and ‘Icon Class Name’ fields. Let’s use the term ‘Carry-Out Price’ for Field Name.
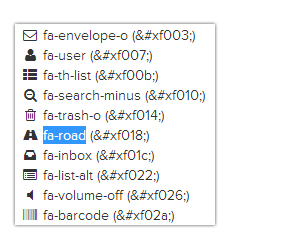
Now we can choose a cool icon for the Icon Class Name from our friends at Font Awesome. Click on ‘Lookup Icon Class Name’ to view all of the current awesome icons you can use for the custom field. Once you click the link you will now be at the Font Awesome Cheatsheet page. Copy the ‘fa-road’ code for our ‘Carry-Out Price’ field name.
Place the ‘fa-road’ or whatever icon code you chose from Font Awesome Cheatsheet to the ‘Icon Class Name’ field. Hit the ‘Save Changes’ button and let’s move onto step 5.
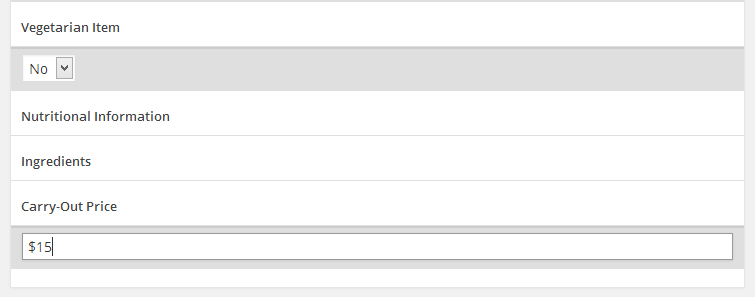
Visit the menu item that you want to add the custom field to and scroll down to the bottom of the menu item page. You will see the field that we just created ‘Carry-Out Price’. Enter a value into the field and then publish or update the menu item.
Now let’s visit the front end of your menu and see the custom field. You’ll notice that the field is at the bottom of your menu item that you just updated. That’s it, now you have added your first custom meta field. Try to be creative and use these fields for an unlimited amount of options.

Are you stuck or having issues with foodpress plugin? not to worry drop us a line on our support forum or search for topics related to your issues thats already answered for quick solutions.